
Turning on the kitchen faucet and getting a weak, disappointing trickle instead of a strong steady stream makes even simple tasks frustrating. Filling a pot takes forever, rinsing vegetables feels inefficient, and washing dishes becomes more effort than it should be, highlighting the importance of reliable kitchen plumbing.
Low water pressure in a kitchen faucet is one of the most common plumbing complaints among American homeowners, and the good news is that most causes are simple to identify and fix without professional help.
Why Is My Kitchen Faucet Pressure Low?
Before reaching for tools, understanding what typically causes weak kitchen faucet pressure helps you go straight to the right solution.
Most cases of low kitchen faucet pressure trace back to one of these common causes:
- A clogged or mineral-blocked faucet aerator
- Partially closed supply valves under the sink
- A kinked or damaged supply hose
- Debris inside the faucet cartridge
- A failing or worn faucet cartridge
- Low pressure throughout the entire home rather than just the kitchen
Working through each possibility in order from simplest to most complex saves time and avoids unnecessary repairs.
Fix 1: Clean the Faucet Aerator
Starting here makes sense because a blocked aerator causes the majority of kitchen faucet pressure problems in homes with hard water.
The aerator is the small screen fitting screwed onto the tip of the faucet spout. Its job is to mix air into the water stream and regulate flow. Over time, mineral deposits from hard water collect inside the aerator mesh and gradually restrict the flow of water until pressure drops noticeably.
Removing and cleaning the aerator takes about 10 minutes:
Wrapping a cloth around the aerator before gripping it with pliers protects the finish. Turning counterclockwise unscrews the aerator from the spout. Disassembling the small components inside reveals the mesh screen where mineral buildup accumulates most heavily.
Soaking all components in white vinegar for 30 minutes dissolves calcium and magnesium deposits effectively. Scrubbing the mesh screen gently with an old toothbrush after soaking clears any remaining residue. Rinsing everything thoroughly under running water and reassembling the aerator completes the job.
Testing the faucet after reinstalling the aerator confirms whether mineral buildup was responsible for the pressure drop. Most homeowners notice an immediate and significant improvement after this simple cleaning.
Replacing the aerator entirely costs between $3 and $10 if cleaning does not fully restore pressure. Bringing the old aerator to the hardware store ensures you purchase an exact thread-size match.
Fix 2: Check and Open the Supply Valves Under the Sink
Moving on to the next most common cause saves time when cleaning the aerator does not fully resolve the pressure issue.
Two supply valves sit beneath every kitchen sink, one controlling hot water and one controlling cold. Both connect the household supply lines to the faucet above. If either valve is partially closed, it restricts water flow to the faucet regardless of what pressure the rest of the home receives.
Opening the cabinet under the sink and locating both valves on the supply lines running up from the wall takes about 30 seconds. Turning each valve fully counterclockwise confirms both are completely open.
Valves that feel stiff or difficult to turn have likely sat partially closed for a long time. Applying gentle steady pressure while turning usually opens them without damage. A valve that will not turn or feels seized benefits from a few drops of penetrating lubricant left to work for several minutes before trying again.
Turning the faucet on after opening both valves fully and checking whether pressure has improved confirms whether a restricted valve was the culprit.
Fix 3: Inspect the Supply Hoses for Kinks or Damage
Checking the flexible supply hoses that connect the valves to the faucet inlet ports catches another common and easily overlooked cause of pressure problems.
Reaching inside the cabinet and running a hand along each supply hose from the valve up to the faucet connection identifies any kinks, sharp bends, or areas where the hose has been compressed against the cabinet wall or other components.
A kinked supply hose restricts water flow in the same way a bent garden hose does. Straightening the hose and repositioning it away from sharp edges or tight spaces often restores full pressure immediately.
Supply hoses that show visible damage, corrosion at the fittings, or bulging sections need replacement regardless of whether they are currently leaking. Replacing a supply hose costs between $8 and $20 and takes about 15 minutes with basic tools.
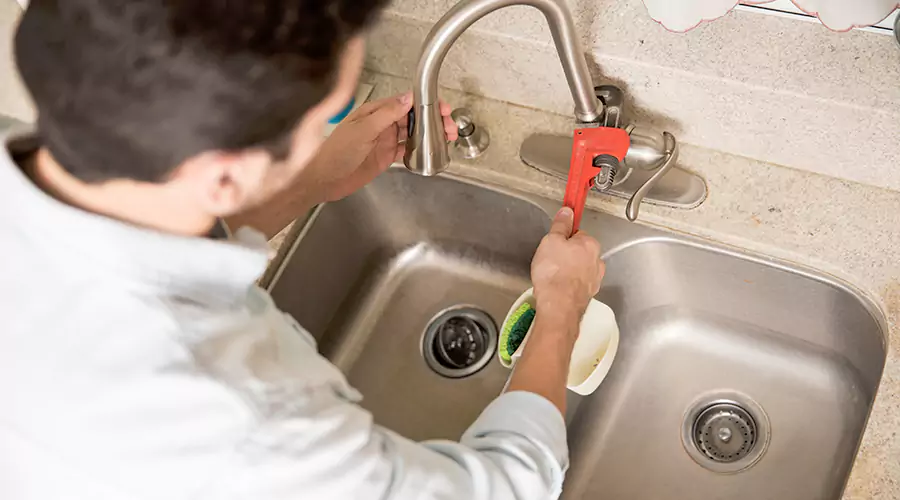
Fix 4: Clean or Replace the Faucet Cartridge
If cleaning the aerator and checking the supply side of the faucet has not resolved the pressure issue, the problem likely lives inside the faucet body itself.
Most modern kitchen faucets use a cartridge valve that controls water flow and temperature. Mineral deposits, debris from the supply line, or normal wear over time can restrict flow through the cartridge and reduce pressure at the spout.
Accessing the cartridge requires a few additional steps:
Turning off both supply valves under the sink completely before starting prevents water from spraying during disassembly. Opening the faucet handle fully releases any remaining water pressure in the lines.
Locating the decorative cap on the faucet handle and removing the screw underneath allows the handle to pull straight off. Removing the retaining nut or clip that holds the cartridge in place with an adjustable wrench exposes the cartridge itself.
Pulling the cartridge straight out and inspecting it for visible debris, mineral buildup, or physical damage determines whether cleaning or replacement is the right next step.
Soaking a moderately scaled cartridge in white vinegar for several hours and rinsing it thoroughly sometimes restores adequate flow. Cartridges showing heavy mineral deposits, physical cracking, or worn seals need full replacement.
Taking the old cartridge to a plumbing supply store or hardware store confirms the correct replacement model. Sliding the new cartridge into place in the same orientation as the original and reassembling the handle in reverse order completes the repair.
Fix 5: Check Whether Pressure Is Low Throughout the Home
Stepping back and testing other faucets throughout the house identifies whether the pressure problem is isolated to the kitchen faucet or affects every fixture.
Turning on a bathroom faucet, checking the shower, and running a garden hose for a moment gives a clear picture of whether the kitchen is the only affected area.
If every fixture in the home runs with weak pressure, the cause lies with the main supply rather than anything specific to the kitchen faucet. Common whole-home pressure causes include a partially closed main shut-off valve, a failing pressure reducing valve, low municipal supply pressure, or corroded supply pipes restricting flow throughout the system.
Addressing whole-home low pressure requires a different approach than fixing an isolated kitchen faucet issue. Working through the steps covered in a dedicated low water pressure guide or calling a licensed plumber for a full pressure diagnostic addresses the root cause at the supply level.
Fix 6: Replace an Old or Failing Faucet
Kitchen faucets that are more than 15 to 20 years old sometimes develop pressure problems that cleaning and cartridge replacement cannot fully resolve. Internal components wear beyond the point where maintenance restores reliable performance, and the most cost-effective solution becomes a full faucet replacement.
Modern kitchen faucets deliver strong, consistent pressure and include features like pull-down spray heads, touch activation, and built-in filtration that older models cannot match.
Choosing a replacement faucet involves confirming the number of mounting holes in the sink deck, measuring the sink thickness for correct installation hardware, and selecting a model that matches your existing plumbing connections.
Replacing a kitchen faucet is a manageable DIY project for most homeowners with basic plumbing experience. Turning off the supply valves, disconnecting the supply lines, removing the mounting hardware holding the old faucet, and reversing the process for the new unit covers the essential steps.
Calling a licensed plumber for faucet replacement makes sense when the sink configuration is complex, when the supply valves also need replacement, or when access under the sink is restricted and makes the job significantly more difficult.
Preventing Low Kitchen Faucet Pressure in the Future
Keeping the kitchen faucet running at full pressure over the long term requires very little ongoing effort.
Cleaning the aerator every three to six months prevents mineral buildup from accumulating to the point where pressure drops noticeably. In homes with hard water, cleaning more frequently keeps the flow consistently strong throughout the year.
Checking supply valves periodically and confirming they remain fully open costs nothing and takes about 30 seconds during any under-sink inspection.
Installing a whole-home water softener reduces mineral deposits throughout the entire plumbing system, including inside faucet aerators, cartridges, and supply lines. Homes in areas with high hard water levels benefit significantly from this upgrade in terms of both faucet performance and appliance longevity.
Flushing the supply lines briefly when replacing the aerator or cartridge clears any debris that has accumulated in the line before reconnecting the faucet components.
When to Call a Licensed Plumber?
Working through the fixes above covers the vast majority of kitchen faucet pressure problems without professional help. Reaching out to a licensed plumber makes sense when:
- Cleaning the aerator and cartridge does not improve pressure noticeably
- Supply valves under the sink are seized and cannot be opened safely
- Low pressure affects every fixture in the home rather than just the kitchen
- The faucet body shows signs of internal damage or corrosion beyond normal wear
- Faucet replacement involves complex sink configurations or simultaneous valve replacement
A licensed plumber diagnoses the exact source of pressure loss quickly, recommends the most appropriate repair or replacement, and ensures all work meets local plumbing code requirements.
Summary
Weak kitchen faucet pressure is a frustrating but very solvable problem for most homeowners.
Cleaning the faucet aerator addresses the most common cause quickly and at almost no cost. Confirming the supply valves are fully open and checking the supply hoses for kinks covers the next most likely causes before moving on to more involved repairs.
Cleaning or replacing the faucet cartridge resolves pressure issues that originate inside the faucet body itself. Replacing an aging faucet entirely delivers the most reliable long-term improvement when internal components have worn beyond the point of effective maintenance.